Happy Wednesday friends! So, I have a quick, easy and CHEAP wall art tutorial to share with you all:)
When I say quick I mean you can do this while you are doing laundry and cleaning the house:) When I say easy I mean anyone can do this:) and when I say CHEAP I mean I only paid $3.00 for the entire piece!
Here's how you can do the same!
I started with a scrap 1x12 that I cut in half to make 2 21" pieces. I didn't pick the measurement it just happend that the scrap piece was 42" long.
I then found a scrap 1x4 that I cut down to 2 pieces at 6" and 1 at 21".
It's coming along...
Next, I painted the 1x12's with Behr Cozy Cottage. I chose latex paint because I knew I would have to use a lot of spray paint to cover this large of a piece.
Next, I stained the 1x4's with Minwax Dark Walnut. While the paint and stain dried I did laundry...not fun but efficient!
I used Gorilla Glue Wood Glue to attach the 2 1x12's. I liked the way it was looking but it needed a little more..
I have tons of iron crosses packed away that I am not using to decorate so.... let's try that!
Needs a coat of Rust-Oleum Blue Sky Spray Paint....
We have a winner but first a little distressing with my 3M sanding block...
I used Gorilla Glue Epoxy to attach the wooden cross to the board and the iron cross to the wooden cross.
I finished up with my 3M sanding block on the edges of the boards followed by Minwax Dark Walnut to enhance the distressed edges. I rubbed the excess stain all over the boards as well and here it is....
I hope you all like it! I will share a tutorial on how I am hanging it from the wall in my next post:) ~This is where the $3.00 expense comes in!
Thanks so much for stopping by!
~Ashley


10 comments:
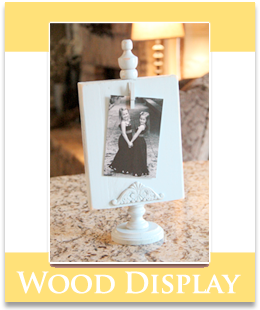
This looks great, I always look forward to what you will do next and you don't let me down. I am getting ready to make one of your diy projects, the wood display. Picked up my supplies tonight! Wish me luck.
Penny
Wow! I love that and it looks really easy. Except for the laundry part. I am going to skip that step! Thanks for the idea!
I have a lot of crosses that I'm not currently using too so maybe I'll give this a try. Thanks for the inspiration!!
Cute post, love the project. I have a cross made of metal and glass that would be perfect for this. Great tip!
Jody
hi,
am leaving this comment here because i don't know if you would check out comments from previous posts!...i just recieved the O'Keeffe's hand cream in the mail...i was one of the lucky winners of the giveaway..am anxious to try it out..thanks so much! kate
Thanks for sharing. Yay for quick and easy projects!
I LOVE,LOVE,LOVE it!!! :)I can't find that sky blue paint for the life of me! :( did you get it at Home Depot?
Do you use any type of sealer when you stain items? I know you didn't mention that step, just checking b/c I hate sealing it's such pain, but I've also heard that unsealed stain is hazardous. Such a cute idea!
Hi, thanks so much guys:) I did not use a sealer on this piece however, when I am staining a piece of furntiure or a larger project I do use sealer. I haven't heard of it being hazardous if left unsealed.... I will look into this. Thanks!
This is too cute! I must ask a question though!
How do you get the stain to not turn grey?
I was working on a project similar to this (White Background/ roughed up/ wanted a little accent color on the edges) I painted the board antique white, used a sanding block to sand it down and when I put the stain on it and tried to wipe it off it came out grey? Do y'all know a special trick?
Post a Comment