Wednesday, January 12, 2011

Owl Art and a Giveaway!!!


So, I was recently asked to try out this product.


I use blue tape on just about everything so I agreed to give it a try.

This is ScotchBlue's New Painter's Tape Edge-Lock.
I have always had trouble with paint leaking through my blue tape in the past but this tape has the new Edge-Lock Line Protector.

Sounds good... But does it really work?

I have had a project idea in my head for sometime now and knew this would be the perfect project to try my new tape on.

I started by cutting a 1x12x4 piece of white pine into 3 even squares.  If you don't have a saw, you can have Lowe's or Home Depot cut it for you!


After cutting my wood I used a dark mahogany stain with a foam brush to stain each of my pieces.  I let the stain soak for about 15 minutes and then wiped off the excess.

Here they are dry...


Now is where the new ScotchBlue Edge-Lock came into the picture.

I decided the best test for this mighty blue tape was some spray paint!

I lined the edges of my boards with my blue tape.  I lined the tape up with the sides to keep my lines straight.  I then took a second line of tape to cover my edges.


A bit closer...


Now the fun part!

I sprayed each board with my red spray paint.

After letting the spray paint dry I started removing my tape.

The results...


It passed my test for sure!!  Those look pretty straight to me!!!


Woohoo!! How great is that??  I did all three boards without any leaking at all.

I love this tape!

Want to see the rest of it?


Do you like them?  I made them for my little lady's nursery!  I'll show you guys how to make the owls in another post.

You will love this stuff!

For me, there was a very clear difference between ScotchBlue Edge-Lock and the other guys.

If you are looking for painter's tape that TRULY gives you a perfect edge... This is the tape for you!

Want to try some yourself?!?

ScotchBlue will be giving 8 of our readers their own roll of ScotchBlue Edge-Lock to try out!

How do you win?

You can have 3 entries...

1. Leave me a comment here!

2. Follow ScotchBlue on Facebook and leave me a comment letting me know!

3. Follow ScotchBlue on Twitter and leave another comment!

Pretty simple!

Now... Let's hear those comments!


post signature

Tuesday, January 11, 2011

All Finished.... Yeah!!


Remember my craft table I shared in my last post?

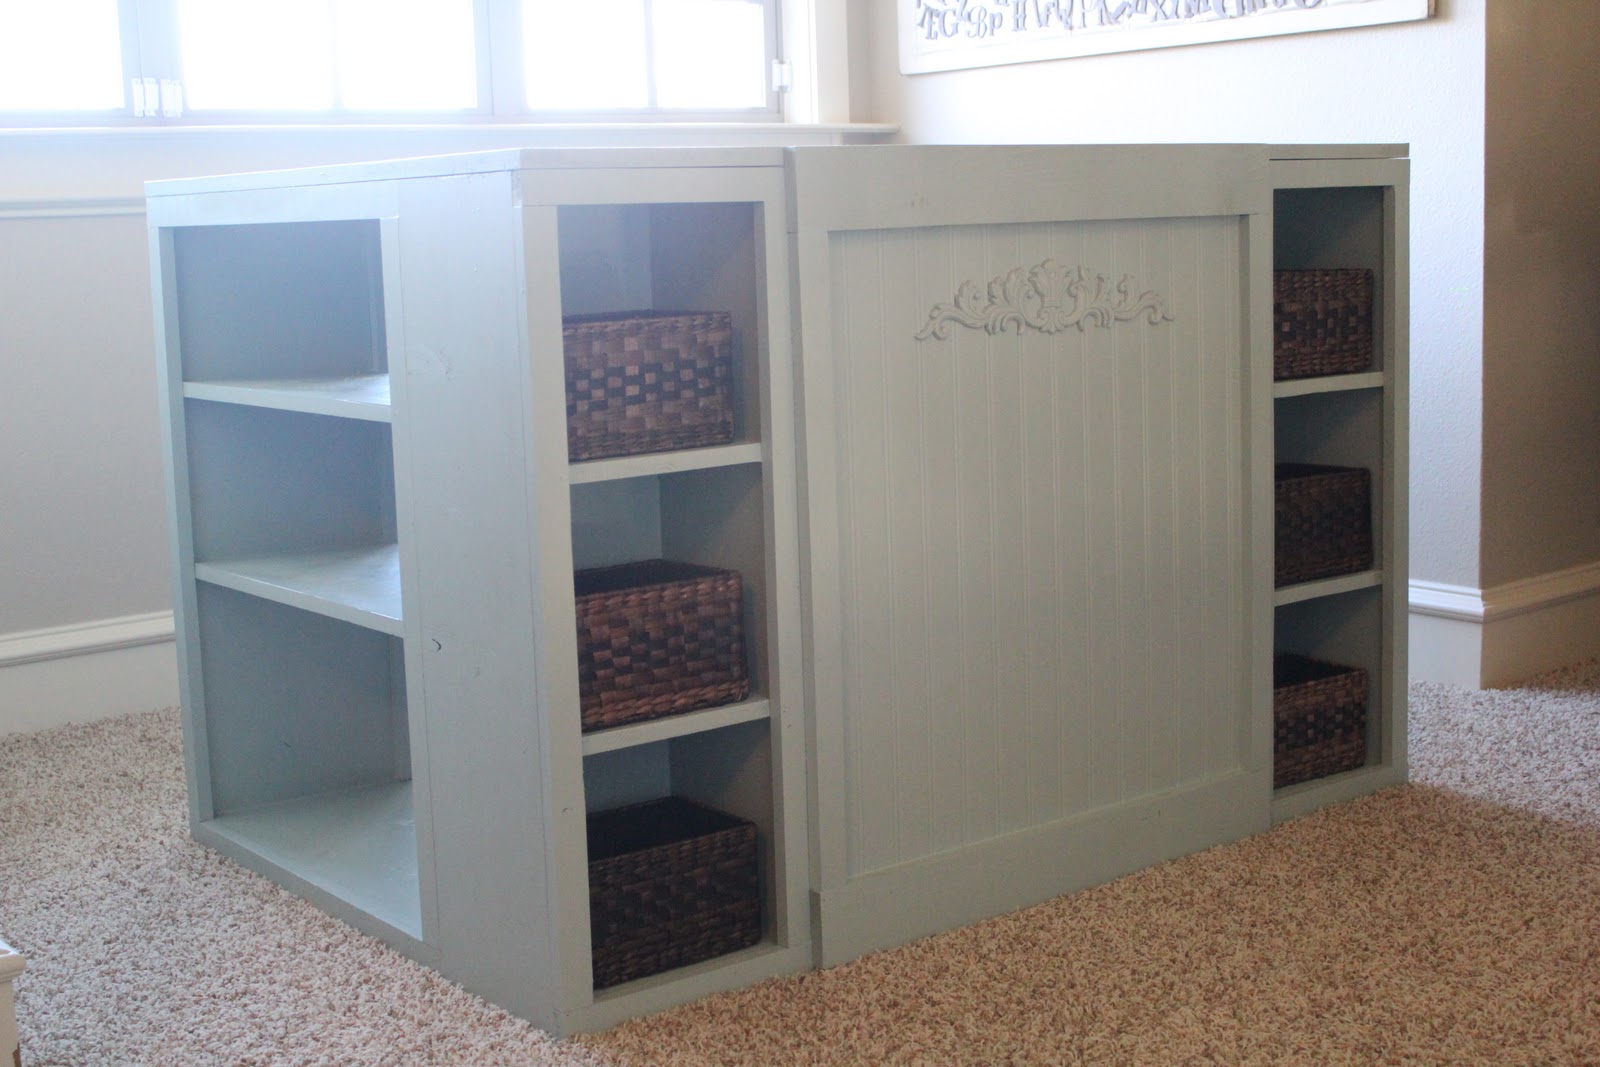
I got it all finished up!!

Here it is...


Here is how I finished it all up!!

I took my three separate pieces up into my loft where my table will be and put the top piece of mdf on my two bases.  I go everything lined up perfectly and then used a 1 1/4" wood screw on each corner to secure the top.  I attached the screws from the underside of my bases so you wouldn't see them on the top.


I then added my hidden shelves by attaching 1x2 to the sides of my bases.  I did two on each side to build 2 shelves.


From the front...


Then I added my shelves.  I had some scrap wood for these and did not bother painting it because nobody but me will see it... Whoop!


When I attached my shelves I placed them 1/4" back from the front of the table.  I did this for my next step.


Next I added my bead board.  I had leftover from my last table project and I painted it in the garage before attaching it.  I cut mine to fit just into my open space and attached it with my nailer to the back of the shelves.


Bigger Pic...


And a look from the backside...


I then added a 1x3 to both the top and the bottom to trim it out.  I had scraps in my garage I used.


After attaching my top and bottom I added my sides using 1x2.


I then caulked the trim and painted it to match the blue of the table.  I loved it at this point but thought I could chic it up just a bit more! 

I bought a $7 wood scroll from Lowe's and painted it.


After it dried I used my hot glue gun (don't tell) to attach it to my bead board. 


I found baskets at Michael's 40% off and added them.  Now I am ready to add all my junk important crafting supplies :-)

What do you think?!?


I love it!!  I made my bottom side shelves just a bit taller than the plans to fit both my sewing machines.  It will be so nice to finally get my stuff out of my kitchen, dining room, bedroom and closet :-)

Want to build you own??

Check out Ana White's site and get inspired!!

There are so many great ideas and fun pieces for your home!


post signature

Saturday, January 8, 2011

I Made it Without My Hubby!!!

Happy Saturday Guys!!

It's that time again!!

We want to see any and all crafts, revamps and projects you have been up to without the help of your man!

This month's party is being sponsored by


Yah... How cute is that name?!?

Emily is the mind behind the Toasted Coconut which features super cute vintage inspired accessories and more!!!

Some of my favs...


How fun are those!!

We will be drawing one random winner from all our entries to win this super cute


You can also become a fan of Toasted Coconut on Facebook!!

So fun!  Make sure you add our party button to your post or sidebar to join the party.

You can find our party button on our sidebar.  So... Here we go!

Link up ladies!!


post signature

Friday, January 7, 2011

What I have been up to....

I just had to give you guys a quick sneak peek at what I have been working on.  Before I get to that I also wanted to let you know that I Made it Without My Hubby will be tomorrow night at 9pm.  Apparently I forgot it was the 7th and didn't get all my ducks in a row so we will all be fashionably late.  Woohoo!  

Now... In my last post I showed you Ana White's amazing site where she shows you plans to build your own knock-off PB furniture.  I am on a bit of a building kick (I think the brad nailer is to blame) and I decided to tackle her craft table.  I decided that I could put some serious use to this baby!!

I followed her plans step by step and got the whole table done in just two days.  I would have finished it in a day but I have had a sick baby over the last week.  Here are my bases...


 I love the height of this table. It's counter height which is perfect for me because half the time I am crafting I am on my feet so this really gives me the option to sit or stand.  Also... STORAGE!! Whoop!  

I did make just a few modifications....

I put my MDF table top directly on my bases rather than doing the floating top.  I did think it looked cool but it added time and cost for me so I canned it.  

I also will be closing off the front to provide more unseen storage under the table.  That is the best kind of storage if you ask me :-)  I can't really show you the details on that one until my next post because I have to get the table up in the loft and assemble it.  So for now.... Here it is before I modify.  

I will be painting it tomorrow.  Can't wait to show you guys when I get it all done.  And... It won't be black!


Thanks so much for coming by!!

Check out Ana White's site for more furniture fun!

We will see you tomorrow with any and all crafts, revamps and projects you gals have been up to without the help of your man!! We have a fun giveaway lined up so be here at 9!!

Thanks so much and have a great weekend!!

~Whitney

post signature

Sunday, January 2, 2011

All Finished!


I got my new table all finished up today!  Yeah!!

I was able to score two baskets for my it at Michaels at 65% off... Whoop!

Here it is all finished up...


I normally don't spray paint furniture but I decided to give it a go.  I was so happy I did!  It only took a few minutes to get the paint on and it dried super fast.  I used our favorite...


After it was dry I used an 80-grit sanding block to shanty the edges up just  a bit.


I love it!! Hope you do too!!  I do think the baskets are missing just a little something so I came up with a solution.  I will be back with that in one of my next posts.

Make sure to check out Ana White's site for SOOO many easy and fun furniture plans.  I'm so glad I did and now I will be planning my next project!  I may have to give furniture away so I can have room to build new stuff :-)

Hope you all had a great and safe weekend!

~Whitney
post signature
 
Designed by Deluxe Designs