Friday, March 4, 2011

How's it Hangin'

Hi friends!  Things have been a little crazy this past week.  I coach at a competitive cheerleading gym and two of Whitney's girls cheer there.  We had our Nationals competition this past weekend and although it was so fun, we have been drained!  I told you I would share how I put my DIY Wall Art up on the wall so here's a quick tutorial for ya'll!
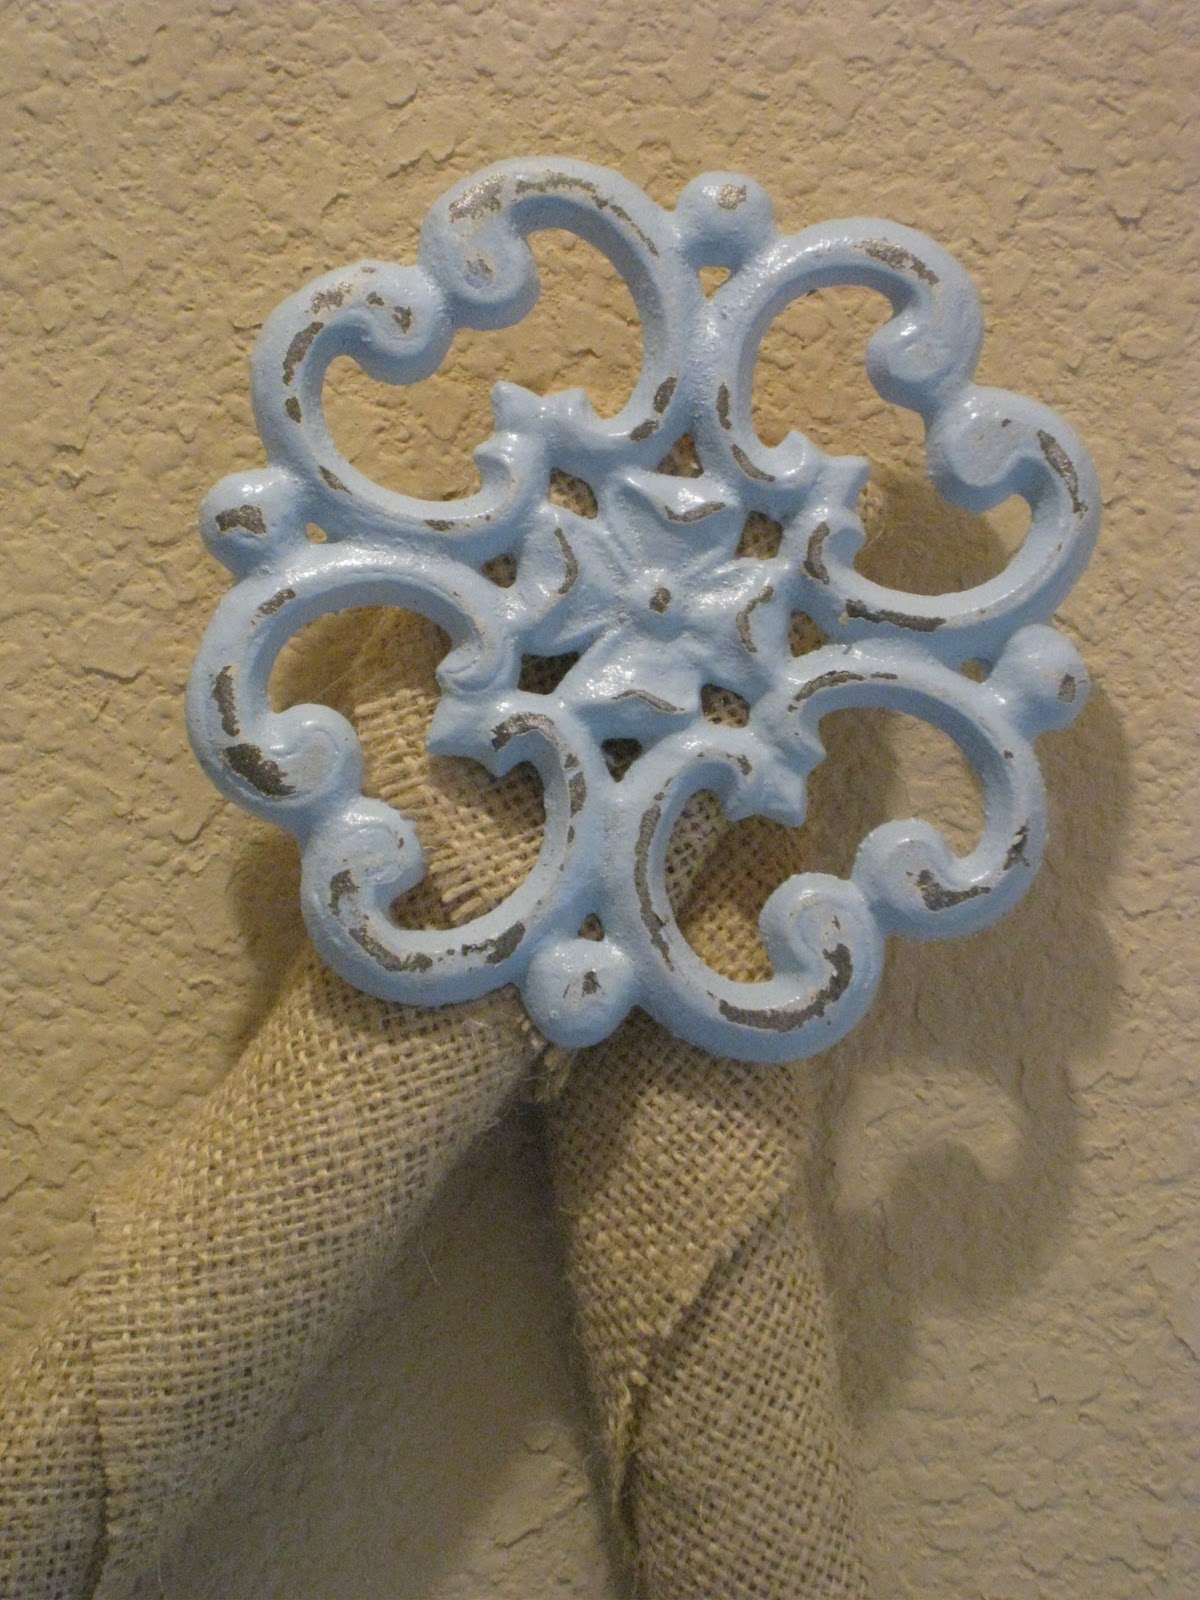

I started with this metal piece from the garden section at Hobby Lobby.  I used a coupon so it was about $3.00.

I spray painted it with Rust-Oleum Blue Sky spray paint and then roughed it up with my 3M sanding block.

Next, I used a piece of scrap burlap and cut it into a square.  Then I folded it in half to make a triangle.

I rolled it up...

and secured it with a dab of hot glue.

Next, I folded the burlap roll in half and secured with another dab of hot glue.

I pushed a hanging nail through the middle of the burlap

Pushed it through the wall...

and nailed the ends of the burlap roll to the wall as well.


Next, I used a saw tooth hanger, purchased at Hobby Lobby, to hange the Wall Art.  I just used one because I didn't feel like lining up two of them:)


So there it is:)  I hope you all like it!  This entire piece cost me $3.00 and that was just for the iron decoration!  Happy Friday and have a safe weekend!

~Ashley


post signature

Wednesday, February 23, 2011

DIY Wall Art

Happy Wednesday friends!  So, I have a quick, easy and CHEAP wall art tutorial to share with you all:) 

When I say quick I mean you can do this while you are doing laundry and cleaning the house:)  When I say easy I mean anyone can do this:) and when I say CHEAP I mean I only paid $3.00 for the entire piece!

Here's how you can do the same!

I started with a scrap 1x12 that I cut in half to make 2 21" pieces.  I didn't pick the measurement it just happend that the scrap piece was 42" long.

I then found a scrap 1x4 that I cut down to 2 pieces at 6" and 1 at 21".

It's coming along...


Next, I painted the 1x12's with Behr Cozy Cottage.  I chose latex paint because I knew I would have to use a lot of spray paint to cover this large of a piece.


Next, I stained the 1x4's with Minwax Dark Walnut.  While the paint and stain dried I did laundry...not fun but efficient!

I used Gorilla Glue Wood Glue to attach the 2 1x12's.  I liked the way it was looking but it needed a little more..

I have tons of iron crosses packed away that I am not using to decorate so.... let's try that!

Needs a coat of Rust-Oleum Blue Sky Spray Paint....


We have a winner but first a little distressing with my 3M sanding block...

I used Gorilla Glue Epoxy to attach the wooden cross to the board and the iron cross to the wooden cross.

I finished up with my 3M sanding block on the edges of the boards followed by Minwax Dark Walnut to enhance the distressed edges.  I rubbed the excess stain all over the boards as well and here it is....


I hope you all like it!  I will share a tutorial on how I am hanging it from the wall in my next post:) ~This is where the $3.00 expense comes in!

Thanks so much for stopping by!

~Ashley


post signature

Friday, February 4, 2011

Basket How-To & Winners!!!


Hey guys!

Thanks so much for all your sweet comments on my laundry room!  Reading them made me smile and I so appreciate you taking the time to leave them!

My kiddos have been home from school the last 4 days because we were hit with an ice storm.... Then a snow storm.  The funniest part was that it was 70 degrees less than a week ago... You locals know what I mean!

I had many questions about these so here we go...

Remember my baskets??


Well... Here is how I did them.  This is super easy!

I started with these great baskets I found at Michael's half off... Woohoo!


I purchased my jute webbing from Joann's at $.79 a yard.  You can find this with the upholstery and drapery supplies... So cute!!


The next step is simple... Just hot glue your jute webbing to the basket.  I eyeballed mine and pretty much stayed centered :-)


I found these binder clips at Target for $2.  I knew I could use them for lots of things so I bought the 50 pack.


Clipped them on...


To make my tags I used my very favorite tool...


I used my Silhouette to cut my tags.  I picked these tags from a ton that they had on their software.  I LOVE the fact that you can buy just one shape at a time for $.99 rather than buying a whole bulky cartridge that you have to keep up with.

I made my numbers using my Silhouette as well.  This is another favorite feature of mine.  You can use any font on your computer which is awesome!  You can download free fonts and literally have thousands of font choices! Once again... That beats the pants off of cartridges girls!

I used a glue stick to stick the tags together and attach my numbers and that was it..... So simple!


And here they are all together...


I found my tin pail at Ikea for $3 and the super cute cherry blossom stem at Michaels for $2.  I thought they finished the space off perfectly.

Hope you like them!  Let me know if you have any questions and make sure I have your email if you want an answer :-)


Now for our ScotchBlue Edge Lock Winners!!!
These winners were chosen randomly...


Congrats!!

Make sure you send me your mailing info at shanty2chic@yahoo.com.

Thanks again to everyone who joined in. Have a great weekend!! Stay warm :-)

~Whitney


post signature
 
Designed by Deluxe Designs