


Hey guys!! Thanks to all of you who are linking up at the Rust-Oleum Revamp party. You still have today to get those projects linked up and we will be announcing a winner soon. You can click HERE or scroll down a bit to enter your project and check out all of the other great revamps. In the meantime... Let's go NUTS! We recently told you about a spotlight we were asked to do for the Gorilla Glue company HERE. We loved our wreath hangers and had to adorn them with cute wreaths as well. I went with a nut and pinecone wreath and this is how I did it...

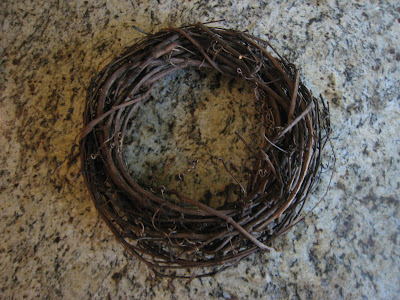
I started by getting the supplies. I purchased a grapevine wreath at Hobby Lobby for super cheap. These can be found at almost any craft or floral store.
I also bought a bag of hazelnuts and 4 lbs of walnuts in the shells at the grocery store. These too were super cheap:) I also bought a bag of tiny pine cones from Hobby Lobby. They were in the Christmas craft section.

My weapon of choice on this one was the hot glue gun. I started by randomly gluing the walnuts around the wreath. I used a grapevine wreath rather than a styrofoam one because I knew I could leave the sides showing which saved me money and I like the look better myself.


Once I had most of the wreath covered in walnuts I began space filling with my hazlenuts and pine cones. Any space that was left between the walnuts was filled with either hazelnuts or pinecones. A look from the side...


My final step was to hang this baby up and take lots of pictures! Woohoo!! What do you think... Have I gone nuts??! Hope you like it... Remember! It's not too late to link up those projects for the RR party. Have a great Tuesday!! I will be adding my nutty wreath to the Shanty Shoppe over on Etsy... Go check it out HERE!


27 comments:
Good Morning Sweetie...
I have to tell you this is absolutely stunning. I just love the simplicity and elegance of it. Your wreath hanger is just so beautiful. I never would have thought about a post to a plague with a hanger on it for a wreath. On the fireplace hearth it would be beautiful. I may have to try this one. How devine.
Thank you for sharing this morning. Please stop by and say hi. I love to have the company.
Country hugs...Sherry
I LOVE IT!!! and I really love the hutch also.
You girls are so cute and talented. I've been following you for awhile and appreciate all the projects you've shared. You certainly inspire me.
Love
Vanessa @ momsgotmanyhats.blogspot.com
Oh how pretty. I love it. You have some of the best ideas. Hugs, Marty
I'm definitely going to make this wreath and wreath stand. I just found your blog a couple weeks ago and it's quickly become one of my favorites! Thanks for sharing so many wonderful ideas and inspiration!!
Too funny I posted a 'going nuts' post last year. Made a walnut wreath too. But I used walnuts from a friends garden. You can find it here:
http://songbirdisnesting.blogspot.com/2008/10/going-nuts.html
Love, M
How very cool! I love how it turned out :)
You did a great job. You have wonderful ideas.
How cool is that! This wreath could work from late summer clear through the seasons.
Love the wreath, especially against the fireplace! I gave you gals a shout out on our blog...Junk-Fest....check it out!
Happy Holidays!
This is so cute!! And as always, you girls make it look so doable. Thanks!! :-)
xoxo
Jane
A winner!! The problem is I'd want to pull out a nut cracker, sit next to it and have myself a little holiday snack. Janell
Love the wreath ! I love your wreath holder display!I just posted a very shabby wreath tutorial on my blog !
Eunice
The Little Things
Another cute idea!
I love it!
How cute is this- Are you sure there are not 20 of yall(instead of 2)? You guys put out more new DIY progects at record speed. So cute I would by this as I hardly have time with work, school and the old fixer upper we bought
I am doing a little giveaway(actually my first ever) at "The Kelton's Cozy Cottage." Be sure to stop by and sign up!
www.thekeltonscozycottage.blogspot.com
I love this idea - I made a Christmas tree using the same concept - will try this wreath as a compliment.
Sylvia
PLEASE let me know where you got the cute hooks? It makes the project. Thanks
Awesome, love the look! Also love getting decor "stuff" at the grocery, then the expense is buried in the grocery budget! ;)
That is STUNNING!! love it, gotta have it. thanks for the idea
Whitney, I love this "nutty" idea for the wreath! It turned out just adorable. How simple and natural.
:-) Sue
I'm loving my new glue gun and this is an excellent project for that! Great idea.
I love this! It would be great for fall and for Christmas. I might even be able to manage this project...if I didn't eat the project materials first :)
Totally nuts over this wreath! sorry, had to do it! LOL
Have to rememeber this for next year
*hugs*Deb
As always...you have lovely ideas and the outcome is stunning. Thanks for sharing such a wonderful tutorial! Come visit me & see what I've created this week. Be sure to leave a comment!
Thanks for sharing! This is really elegant looking!
Love the textures and colors in this wreath. So pretty!
darling!
Post a Comment