Wednesday, March 16, 2011

Crates for the Storage Bed

Hey guys!  I am loving this spring weather we've been blessed with in Texas this week!  Perfect building weather:)  I finished the storage bins for the full sized storage bed I build last week. 
I designed my own plans for these.  My goal was to achieve the most amount of storage space with the least out of pocket!


I started with two 8ft. sheets of 1/4" plywood.  I had the guys at Home Depot rip each sheet at 10.5" x 8'.  I also purchased two 1 x 10's.  (You can have them cut the rest of the measurements but I just used my miter at home).

Here are my measurements:

1/4" plywood:

12 - 10.5 "x 10.5" (sides of crates)
12 - 10.5 "x 28" (bottoms, back and front of side storage crates)
6 - 10.5 x 24 (bottoms, back and side of the end of the bed storage crates)

1 x 10's:

4 @ 29.5" (face of side storage crates)
2 @ 25.5" (face of end of the bed storage crates)


These are the 1 x 10 faces.


I used Gorilla Glue Wood Glue for every joining piece

and followed up with my Ryobi battery-powered nailer.


I used 1/4" plywood to make the entire crate to maximize the storage space. 

Here is where the 1x 10's come in.  For aesthetic reasons I did not want to use the plywood for the face of the crates so I used a ton of Gorilla Glue Wood Glue to attache the 1 x 10 to the front of the crate.  No nailing needed!

I left it to dry....

Crate 1 down:)

After building 5 more crates it was time to stain!  I stained the storage bed with Minwax Dark Walnut and I wanted a contrast for the crates.  I went with my gut and purchased Minwax Special Walnut and applied one coat to the face of each crate.

I followed up with one coat of Minwax Polycrylic in Clear Gloss.

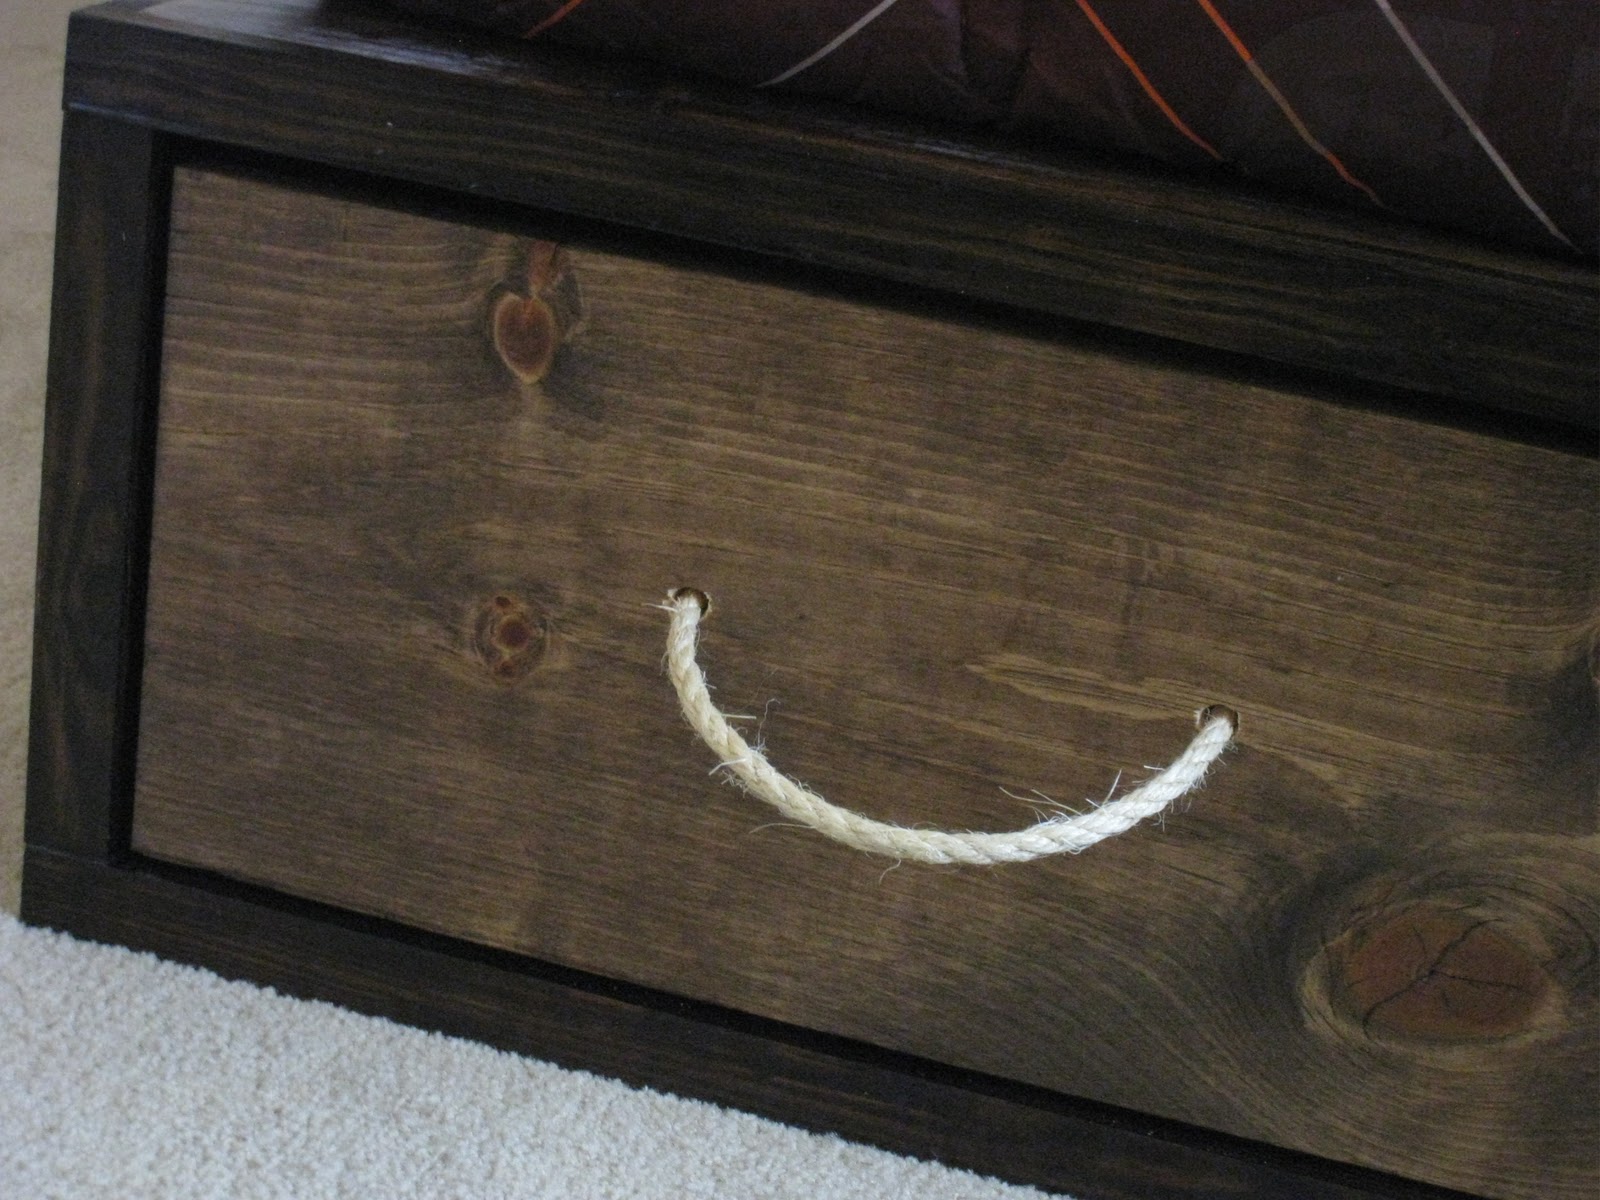
Now for the handles!

I purchased this rope at Wal-Mart for $4.97 and it was more than enough!

 I found this big ol' drill bit in my hubby's tool box and it was the perfect size for the rope!

Next I measured where I needed to drill for the handles.  On the 4 side crates I marked at 19 3/4" and 9 3/4".  On the short end crates I marked at 16 3/4" and 8 3/4".  I placed the marks 6.5" from the bottom of the crates.

I drilled each hole...

and then cut 6 pieces of rope at 28".


I pushed one end through the front of the crate and tied a knot at the end

and I followed up with the other side.

To keep the crates from scratching the storage bed...

I purchased these felt pads at Wal-Mart for $4.97.

These are easy, just pull off of the sheets and stick to the bottom of the crates.

I put four on each crate.

Now the reveal!


I purchased the bedding at Wal-Mart, on clearance, for $10 marked down from $39!  The throw pillow was $1 down from $10! 

I am going to build a headboard for this next and I have changed my mind on the one I am going to build.  I fell in love with the Reclaimed Wood Headboard on Ana's site!

I think it will finish this look of nicely!  In case you were wondering, my 7-year-old is in LOVE with his new bed!  He has asked to take a bath and go to bed early every day for the last week!  The new will wear off but it's nice for now;) 

Hope you all have a great Spring Break with your families!

~Ashley


post signature

Wednesday, March 9, 2011

DIY Full Storage Bed

So, it's spring cleaning time in our household right now!  I have a love/hate relationship with spring cleaning.  I love getting organized and redecorating but I loathe that you have to create endless messes in the house before the final product!

One project I am starting this spring is my 7-year-olds room.  His room has always been pretty hodge-podge because he likes to express himself with crayons and stickers on his furniture.  I have been bribing him the last year that if he could start taking care of what he has then we would redecorate his room.  So, here we are!  We are starting with a big boy bed which is quite an exciting change from his twin/twin, hand-me-down bunk:)


I'm sure you all remember the Twin Storage Bed that Whit shared with you all!  I have always loved the storage beds that I see in certain "high-end" magazines so this was the bed that I went with.  I  
followed the plans for the Full Storage Bed that from Ana's site! 

No more quick trips to Home Depot;)  I love my little shopping buddy and she looks so excited to be shopping with me;)

After building the pieces to the bed I stained it with Minwax Dark Walnut.  It took two coats and it was super easy! 

I let it dry and followed up with a coat of Minwax Polycrylic Clear Gloss.  This was just the look I wanted with the clear gloss!


So far so good!  I absolutely love it now that it is put together.  Anyone can do this and I suggest it because it is so rewarding (and addicting)!  Not to mention that it only cost me $120 compared to $700!

Advice/Pointers:
~ If you mess up, nothing is unfixable!  Wood putty works wonders and I used a TON;)
~ Use Gorilla Glue Wood Glue!  This is what actually joins the pieces together.  The screws/nails are just to hold in place while the glue dries.  This bed is so sturdy that I can jump on it!
~ Make sure you wipe all the glue drips off, especially if you are going to stain the wood.  If you do not, the stain will not penetrate leaving lighter spots (yes, I learned the hard way but fortunately it is not obvious).
 ~ Check all of your boards to make sure they are straight!  If you get home with bowed boards it will make construction a nightmare!  This is very simple.  Just pick one end up to eye level and look all the way down the board to make sure it is pretty level.  Flip over to check all of the sides.
~ You can have Home Depot cut your boards for you.  I cut my own with my miter saw but I have had them cut boards for me before.  (Make sure you bring a tape measure with you so you do not leave with mistakes).

So that's it for now!  I am going to add the Farmhouse Headboard to his bed next.  I love the look of it and I think it will complement the storage bed nicely:)  I am also working on the storage crates for the cubbies.  I am constructing them without plans so I will share the tutorial on those as soon as they are done!

Don't forget to scroll down to our "I Made it Without My Hubby" party to check-out all of the great entries!  It's not too late to enter;)

~Ashley


post signature

Monday, February 21, 2011

Quilt Clip DIY and a Video

Hi friends!  So, the nursery is still a work in progress.  I'm convinced that by the time I have it where I want it Tenley will be ready for a new theme:)  That doesn't take the fun out of the decorating though!

I've been wanting to hang her quilt above her bed but was stuck on how I would hang it because this bedding line does not have matching quilt clips.
I remembered these great clips at Hobby Lobby!

I purchased two medium sized clips.  You can find them in the unfinished wood section and make sure you either use a coupon or wait until wood is on sale.  Otherwise, they are pretty pricey!

I painted them a red that I had mixed at Home Depot to coordinate with the bedding.  I also distressed the edges a bit with my 3M sanding block.

I purchased these sawtooth hangers at Wal-Mart for about $1.00.

I hammered one sawtooth hanger to the back of each clip.

Then I just had to hang them and clamp the quilt down!


Whitney and I have had a lot of requests to share our nurseries with you all.  To be honest, my nursery is just now finally ready to share!  Like I said, it is a work in progress but I'm excited with the way it is turning out so, the best way for me to share it with you all is a video. 


Most of the items in the nursery were either free or bought at a second hand store.  The bed, bedding and chandelier are the only pieces that I purchased brand new!  I love that every piece in her nursery has a story and that the stories will continue from here:)  I hope you enjoyed my little video peek!

Thanks so much for stopping by:)

~Ashley


post signature

Monday, January 24, 2011

The Beds Finished... Well, Almost!


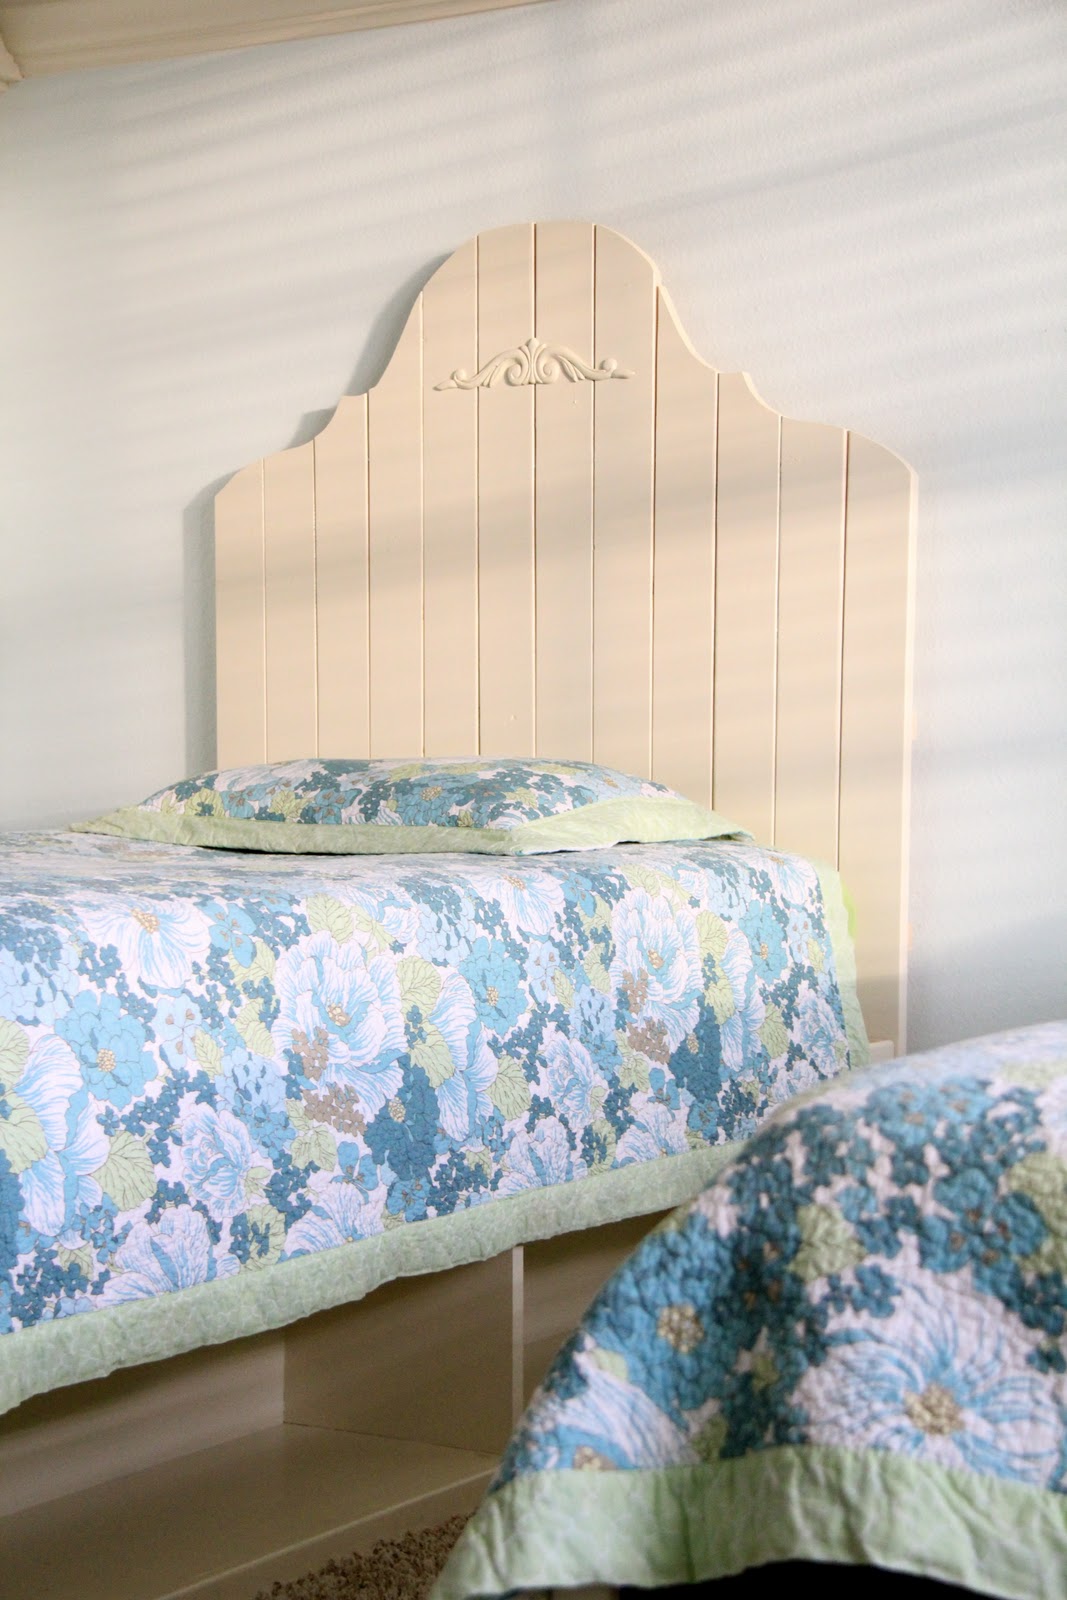
So, I thought I would share the girls' beds finished... Almost.

I love them!  The only thing I still have to finish is the storage underneath.  Here is one...


I wanted a functional storage bed with a fancy headboard.

HERE is the inspiration for my headboard!!

HERE are the instructions I followed for my twin storage beds!!

I spent right around $110 on each bed not including paint.  I thought that was a steal for the function and cuteness I get from them :-)

As I went looking for baskets on Sunday I had an epiphany.  I was having trouble finding baskets that made me happy at a decent price and I saw some unfinished wood crates at Joann's.  I knew I could recreate them and that they would make the perfect storage.  I made one to show you in this picture and I will show you in my next post how I did them.  They were super easy and cheaper than any basket I found.


Hard to get them both in the picture with good lighting but I gave it a go anyway!


I'm pretty sure after now making two of these babies I could build one with my eyes closed.  The building part was easy but I was kind of over the whole painting thing after one bed!  However... I am so pleased with the results!!

These beds are the same color as their dresser.


I probably had 50 or so of you ask about that great Valspar paint color.  I used semi-gloss with the primer mixed in the paint and these are the codes for those that still want it.

The number above the barcode is 

107-35, 101-3.5

The number below the barcode is

2440-A-5483

Not sure which one the paint guy needs :-)

Next up... Finishing 576 or so storage crates for under the beds and then deciding on a nightstand to go in between the beds.  

Hope you like them!!  My girls do... And now they can't shove junk under the bedskirt... Whoop!

Finally... Thanks so much to all of you who leave sweet comments!  I reply to those that I have a return email for but if you leave me a question in a comment and don't leave your email I can't return it.  I'm not ignoring you... I promise :-)

~Whitney


post signature
 
Designed by Deluxe Designs