Tuesday, February 22, 2011

Fun Wall Art & The Sale!


Happy Tuesday guys!!

I want to share a fun wall art project with you guys!  I made these for the older girls' room but I think I may be making some more for mine as well... I love them.


I have 2 blank spaces next to their window that were begging for some love.  I found the branches and birds and that became my inspiration for this project.

I started with some scrap 1x12 I had from some of my latest projects.  These were about 24" long.


I'm kind of into stain at the moment so that's just what I did... Dark Mahogany.


While those were drying I started working on the cute stuff.

I used my Silhouette to cut shapes out.  I found the birds and branches on the Silhouette software and cut it out using the machine.  There is nothing better than shopping from the comfort of my computer chair.

I used Silhouette's Premium Vinyl for these birdies and branches.

Once the machine cut it, I peeled the extras off first.


Then, I used the transfer paper to attach it to my wood.  This is my first time to use the transfer paper and I LOVE it.  I usually try the old peel and stick method but I knew that wouldn't work with all the details.  


You just peel the transfer paper off.... So easy!
I had originally planned on being done at this point but I thought it needed a little extra something.  I remembered some cream flowers I had from making the baby some headbands. 


Pulled out the glue gun...


And started attaching.


I had to cover up my holes so I used some extra pearly buttons and hot glued them too.


I found these great hooks in the garden section at Hobby Lobby for 1/2 off... Whoop!


I drilled a couple holes in each one, added some twine, and hung them up.... Well, actually I only got one up.

The babies were not enjoying this project as much as I was.  I did manage to get one up to show you though :-)


Hope you like it!

For those of you that stuck with me through those 348 pictures.... Here is this month's sale!

Shanty Silhouette Sale is running from 2/23 - 2/28

Use the code SHANTY at checkout to receive...

Silhouette SD Machine
1 Roll of Black Premium Vinyl
1 Roll of Frosted Vinyl
1 Roll of Transfer Paper
Home Decor CD

All for $225!!

ALSO!!

All Premium Vinyl is 25% off!!

Make sure to use the code SHANTY at checkout!

Silhouette Electronic Cutting Tool

Thanks so much for stopping by! Let me know if you have any questions!

~Whitney

post signature

Sunday, November 21, 2010

Burlap and Drop Cloth and Ticking... Oh my!!

I promised you more trees and guess what?  This baby requires no sewing!  I have been thinking that my ruffle tree was looking a bit lonely on the bar all by herself so...


Don't they make a cute couple?  I think so!

Here's how I made my rosette Christmas Tree!

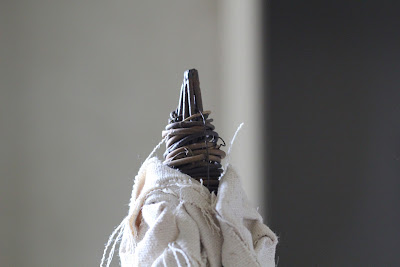
I started with a grapevine tree I purchased at Hobby Lobby for $3.50.  I wanted the vine to show a bit under the rosettes which is why I went with this rather than foam.


For this tree I used 3 different fabrics.  I used the same burlap and drop cloth canvas I used on my ruffle tree and I also used a ticking fabric I found at Joann's.


I cut strips of each fabric about 1 1/2 inch thick and about 14" long.  Then I used my rolled rosette method I shared here to make my flowers!

I would make about 8-12 at a time and then cut them out.


Once I cut them out I glued them to the tree.  I had no pattern in mind... Just used the old eyeball method.


More progress...


I did this all the way to the top.  I won't lie... This wasn't the fastest project I have ever done.  It did take the better part of an afternoon and evening to get these flowers all rolled.  But... I am so pleased with the results!

Here was the top when I finished the flowers.


You can leave it like this or if you like twine as much as I do you can finish off the top with it.  I used twine to wrap the top and add a couple jingle bells.


I did like the look of my other trees on the base so I filled the inside of this tree with styrofoam and attached a base just like I did on the ruffle trees.

That's it!  If you own a hot glue gun, you can make this tree!  Once you finish your tree you will be a rolled rosette champion!  Here's a few more pictures of mine...


Hope you like them!!  Remember... Directions for the rosettes can be found HERE!

Thanks so much for stopping by!  We have some really exciting things happening this week on the blog so stay tuned!

Have a great week!!

~Whitney
post signature

Wednesday, June 30, 2010

Lace Flower Tutorial

Hey guys! I wanted to show you gals how I made my lace flowers that I used here...


And here...


It all started when I stumbled upon this great stuff at Joann's.


It's called Wright's Flexi-Lace Hem Facing and it comes in LOTS of great colors.  It also comes in two different sizes but I prefer the larger 1 3/4" lace for my flowers.  I originally purchased it to make flower headbands for the new baby but then found myself gluing them to things all around the house.

I did sew these but don't click the red X just yet.... If you have a machine and you can do a straight stitch then these are a piece of cake!  You only need a ruffler foot like mine below.


You can get them at your local sewing machine shop or online.  Just make sure you get one that is compatible with your machine.  It's so super easy.  Just click it on and sew a straight stitch.  It does ALL of the work for you.  You can adjust it to gather as much or as little as you like... Can't beat that!

My first step was to open up my lace and cut it in half.  This left me with 2 strips of lace.  Then, I folded one piece in half like this.


I stuck the folded end into my ruffler and 30 seconds later I had this...


Next, I drew a circle on a piece of matching felt.  This just keeps me from making my flower an odd shape.  The rest is just hot glue! I made a circle on a piece of matching felt.


Starting with the outside of the circle I glued the folded edge down to the felt following the circle.


Once I reached my starting point I just moved to the inside of the first circle and continued gluing.


Once it was all finished it looked like this.


You can stop there or add a super cute button like I did.


I cut the shank off the back of the button using pliers.


Then I hot glued it down to the center of the flower.


Here it is all finished up...


My last step was to cut the felt from under the flower which leaves the back looking like this.


Now all you need is a cute place to attach it.  I added mine to my lamps and wreath but I will also be back to show you how to make SUPER cute headbands for yourself or your little princess.  It's becoming a bit of an obsession I'm affraid :) !  Hope you girls liked it! Let me know if you have any questions and go get yourself a ruffler foot... TODAY!  Happy Wednesday!


~Whitney

 
post signature
 
Designed by Deluxe Designs