



Thursday, December 17, 2009

Shanty Photo Art

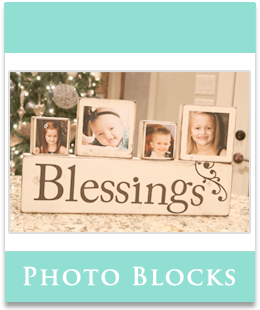
So with 7 days to go I finished my LAST Christmas gift today... WOOHOO:)!  I am usually so last minute and find myself at Walgreen's on Christmas Eve picking up at least 2 that I forgot but this year I finally had my act together.  All of the siblings draw names for Christmas and I picked my youngest sister.  Her request this year was framed pics of my kids... easy enough.  But... I wanted to "shanty" it up a bit.  Here is what I did...


I started by getting my supplies.  I found some super shanty 4X6, 5X7, and 8X10 frames at the Dollar Tree.


I also used this great applique from Do It Yourself Chic!  I love it!!


DIY CHIC


And... a super cute but much in need of a makeover large frame.


I started by giving all of my pieces a few good coats of our favorite... Rust-Oleum Painter's Touch in Canyon Black.


While that was drying I started on the next step.  I originally planned on covering the cardboard with burlap but this frame had a plastic piece rather than glass so I just decided to cover it instead.  I sprayed the plastic with spray adhesive.


I then cut the extras off and left a couple inches to work with.


My hot glue gun came to town at this point.  I was done in almost no time!  I started by gluing my extras to the opposite side of the plastic.


When I was done it looked like this...


I then put the covered plastic back into the now black frame and it looked a bit like this...


Awww... Already soooo much better don't you think:)!

The next step was to arrange and glue all my frames and my applique.  I eyeballed them and placed them where I wanted them and then used the hot glue again to attach each frame to the burlap.


And when I was finished it looked like this...


Almost finished...  My final step was to add my little clippies.  I found these at Walmart at around $1 for 2... woohoo again:)


I used my hot glue again to attach a clip to the center of each frame.


Now for my favorite part... the adding of the kiddos!  I printed out some b&w's at Walmart and clipped them up.  I LOVE how it turned out! I wanted to give her something that she could easily change out and maybe someday put pics of her own kids... hint, hint Leash;)  I also love the mix of the burlap, metal and fancy black.  It just makes me smile.  Now... I must make myself give it up:)  That is the hardest part!  So guys... What do you think??


The applique made the piece in my opinion!  You have to go check them out.  They are cheap, easy to work with and she has LOTS to choose from! Just click the link below to check DIY Chic out!!


DIY CHIC


Also... Thank you guys so much for my birthday wishes!!!  Each one of them makes me smile and I love reading them.  We will announce a winner of the giveaway in the next couple days so you still have time to comment.

AND:)!
Don't forget about our shindig coming up on January 7th!  We want to see EVERYTHING you have done without your hubby's help!  Can't wait! It will be so fun!  You can grab our button on our sidebar to add it to your blog.  Thanks so much!!


Shanty 2 Chic


~Whitney


Funky Junk's Saturday Nite Special


post signature

Saturday, November 14, 2009

Ashley's Christmas Apothecaries

Happy Saturday friends!!!!  So, I promised I would get back to you on my Christmas decorating ideas for my apothecary jars and I am keeping my promise!!!  I just love Christmas so I couldn't wait to dress these babies in their Holiday best!


The how to on the style!


I purchased one bag of snow flakes at Hobby Lobby...


and a bucket of silver ornaments from Wal-Mart (I will use the leftovers for my tree...yay for multiple uses!)

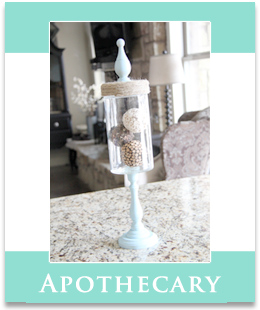
I poured a little bit of snow in each apothecary, picked my favorite ornaments from the bucket and stacked two in the tall apothecary and one in each of the other two.


Hey...when you live in Texas you have to make your own Winter Wonderland!!!


Ahh!  I love the simplicity!!!!  If you missed the tutorial on the apothecaries you can see it HERE!

Don't forget to stop by our new Etsy shop ~ The Shanty Shoppe ~ where we have these and many other shanties available for purchase!!!!  You can go HERE to visit or click on the Shanty Shoppe button on our sidebar!!!  Happy shopping!!
UPDATE:
The DIY Show Off


post signature

Thursday, November 12, 2009

Whitney's Magnetic Recipe Holder

UPDATE~
We will be linking up at this great party!!


and WFMW at We are that Family!!!


Hey guys!!  My next project was inspired by my recent love of magnets and galvanized tin.  I decided to create a recipe holder for my kitchen!!



 It's a cutie!... This is what I did...

I purchased a 1x8x4 at Lowes and a large square dowel...


I also purchased a small craft circle...


My first step was to cut the dowel.  I cut it about 11" long.  I then used my Gorilla Glue Epoxy to attach the dowel to my wood circle.


I then cut my 1x8 10" long.  I used the epoxy to attach the 1x8 piece to the front of the dowel.


Then I let it dry a bit...


I used my drill to put a hole in the top for the finial.


And here is was ready for paint!!!


I painted that with Rustoleum American Accents Heirloom White spray paint.  After that was dry I started working on the next step.

I decided to shanty the edges up a bit with my sander and a bit of Minwax Dark Walnut stain...


I then added a bit of Ralph Lauren Smoke Glaze... You guys know the routine!!


I found this galvanized roof flashing at Lowe's...


I cut a piece just a bit smaller than the plaque I attached to the dowel.


I then used my epoxy again to attach the metal to the plaque to the wood piece. I added a silver nail in each
 corner for a bit of shanty-ness!!


Now for my magnets... I used the same super cute Fleur-de-lis wood pieces that Ash used on a previous procect.  I painted and glzed them the same and then used some Gorilla Glue to attach the magnets.


All finished... Now it just needs a great recipe...


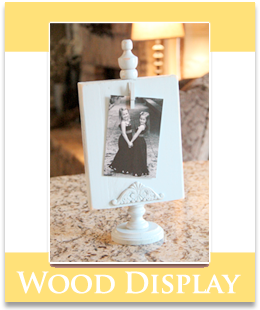
It also makes a great picture holder...


What do you think??!  This will be our newest addition to the Shanty Shoppe on Etsy.  After several requests we decided to start offering some of our shanties on Etsy.  You can visit us by clicking on the Shanty Shoppe button on our sidebar or by clicking HERE!!!

Thanks so much for all of your sweet comments on Traci's Shanty Spotlight post. If you have not had a chance to check it out just scroll down a bit... so fun!!

Update~

I will be joining this party


Funky Junk's Saturday Nite Special
 
I will also be linking up to Met Mondays at Between Naps on the Porch!!
 
 
DIY Day @ ASPTL
 
I will also be linking up at the Shabby Nest for Frugal Friday!


post signature
 
Designed by Deluxe Designs